Baking · Creativity

Banana Cupcakes

Today I am posting one of my favourite cupcake recipes.

The Banana Cupcakes.

They are simply delicious, moist, heavy and sugary!

All you could want for a nice afternoon tea and a sugar boost.

I found the original recipe in my favourite Marian Keyes’ book, Saved by Cake, but of course!

But I took liberty to change some bits as i wanted to add my own twist to it. Hope she doesn’t mind.

RECIPE:

Ingredients:

125 gr butter

125 gr caster sugar

2 eggs, beaten

3 or 4 very ripe bananas

125 gr self-raising flour

100 gr dulce de leche ( you can find it in supermarkets here as Carnation Caramel, a Nestlé product, in the same shelf as Condensed and Evaporated Milk).

For the Icing:

100 gr dulce de leche

300 gr icing sugar

3 teaspoons of water (add more or less as needed for consistency)

INSTRUCTIONS:

Preheat the oven to 170 degrees C / 325 F / gas 3 and line a 12-hole cupcake tray with paper cases. (I used silicone ones, that I thought would be better to hold the toffee inside the cupcakes).

Cream the butter and sugar until pale and fluffy, then add the beaten eggs.

Mash the bananas and gently add to the mix, then sieve in the flour and fold until it’s all absorbed.

Fill the cupcake cases with the dough, until about half way up. Then, place a small round dollop of the dulce de leche into the middle of each cupcake.

Distribute the remaining dough into the cupcake cases, completeley covering the dulce de leche and making sure the edges of the cupcakes are covered by the dough, and the dulce de leche stays right in the middle, as a lovely sweet filling, not leaking to the sides.

Bake for at least 35 minutes. It’s longer than normal for cupcakes,  I know, but the bananas need more time to cook.

The result should be a moist cupcake, but not wet, this is a sign that it needs to go back to the oven.

For the icing, you can just put a layer of dulce de leche on top of the cupcakes, simple and delicious. Believe me, I tried one,  (or was it two?) this way.

Or you can mix the dulce de leche and cream cheese frosting.

I made a glacé icing, with the dulce de leche. In a bowl, I added the water to the sieved icing sugar, mixing gently and constantly. Then I added bit by bit the dulce de leche. I didn’t get to use all of the dulce de leche, as I reached the consistency of the icing before that. But if you want to use all of it, just add more icing sugar, or water, as you go.

The final bit is some grated chocolate sprinkled on top of the cupcakes.

That’s the “cherry on top of the icing, on top of the cake”.

Baking · Creativity

For all the Chocoholics Anonymous out there!

If you are drewling in front of your computer now, this recipe might just be the right one for you.

It is quick enough to prepare, and it doesn’t ask you to get all those complicated ingredients. Maybe, being addicted to chocolate, you probably have most of the ingredients in your cupboard already.

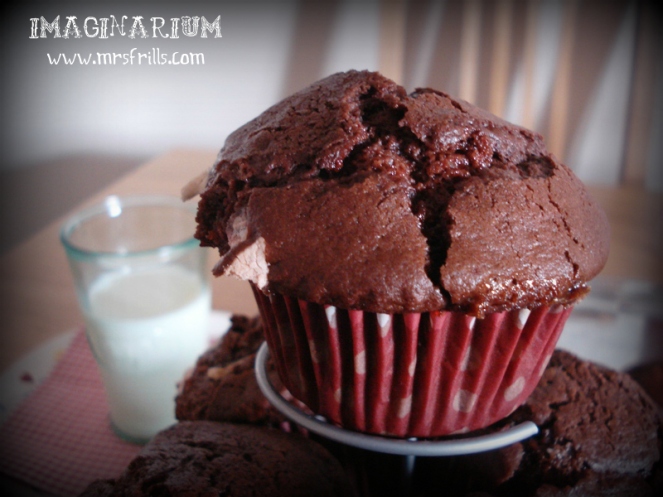
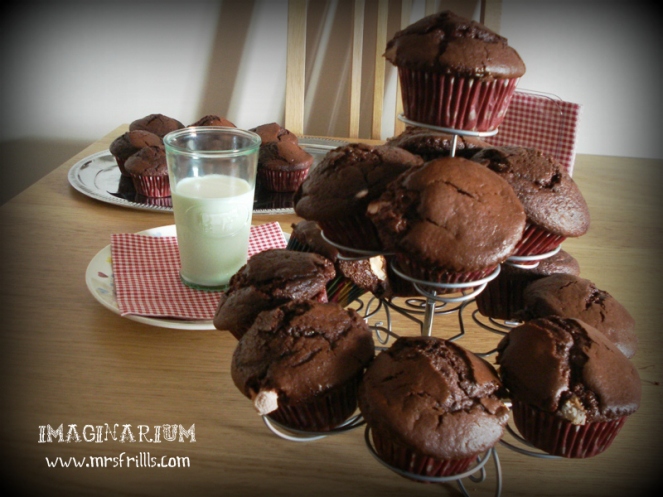
That’s how I made my delicious chocolate muffins!

Here is the recipe:

250 gr self raising flour

75 gr cocoa powder

2 tsp baking powder

175 gr caster sugar

2 large eggs

1 – 2 tsp vanilla extract

175 ml milk

100 ml sunflower oil (or another oil of your preference)

You can start by preheating the oven to 170 degrees C, and lining a 12 hole muffin tray with paper muffin cases.

Then, sift together the flour, cocoa, and baking powder. Stir in the sugar. In a separate bowl, beat the eggs and the vanilla extract, add the milk and the oil to this mixture.

Now, add the liquid ingredients to the dry ingredients, mixing lightly together.

Spoon the mixture into the prepared cases. Bake for approximately 20 minutes or until golden and springy to the touch.

Cool for 10 minutes, transfer to a wire rack and leave until cold.

That is it! Simple enough for you?

If you fancy a bit of risk, and more work, you can add some chocolate chunks to the muffins, or some marshmallows, yum!

If you want a more chocolatey and heavy muffin you can add 70% cocoa solid chocolate chunks into the muffins. I used about 200 gr for each muffin tray.

And for the sweetest tast of all you can add some marshmallows, I used the small marshmallows that are proper for baking. About 5 or 6 in each muffin. But quantity in this case is up to you, just don’t let the dough pour out of the muffin cases, or you won’t have muffins, you will have a disaster inside your oven!

Either choice you make, chocolate or mashmallow, I advise you to add them in the middle of the muffins, like this:

Spoon half the mixture in the muffin cases, add the chocolate chunks (or the mashmallows). Then add the other half of the dough, covering completely the chocolate chunks (or mashmallows), so when they melt in the oven, they don’t burst out of the muffin into your oven.

Mind you, sometimes it happens anyway, but the muffins are still delicious!

Don’t expect to find any of the chocolate or the marshmallows when you are eating the muffins later. They will be melted into the muffin, and all you will feel is their sweeteness and choco taste.

These muffins are perfect for an alternative afternoon tea, and go perfectly with cold unsweetened milk.

A treat for our chocoholic tummies! Enjoy!

Baking · Creativity · Holidays

Paddy’s Day Cupcakes

This year we are back in Ireland for Paddy’s Day! Yay!

To celebrate I made some cupcakes. I had some ingredients sitting in my cupboard, so I went for two different recipes.

Green Cupcakes (Vanilla Cupcakes)

For this recipe I followed these instructions on the BBC website.

http://www.bbc.co.uk/food/recipes/cupcakes_93722

Ingredients:

110g butter softened at room temperature

110g caster sugar

2 eggs, lightly beaten

1 tsp vanilla extract

110g self-raising flour

1-2 tbsp milk

For the buttercream icing:

140g butter, softened

280g icing sugar

1-2 tbsp milk

a few drops of green food colouring

Preparation Method:

Pre-heat the oven to 180C/350F/Gas 4 and line a 12-hole muffin tin with paper cases.

Cream the butter and sugar together in a bowl until pale. Beat in the eggs a little at a time and stir in the vanilla extract.

Fold in the flour using a large metal spoon, adding a little milk until the mixture is of a dropping consistency. Spoon the mixture into the paper cases until they are half full.

Bake in the oven for 10-15 minutes, or until golden-brown on top and a skewer inserted into one of the cakes comes out clean. Set aside to cool for 10 minutes, then remove from the tin and cool on a wire rack.

For the buttercream icing, beat the butter in a large bowl until soft. Add half the icing sugar and beat until smooth.

Then add the remaining icing sugar with one tablespoon of the milk, adding more milk if necessary, until the mixture is smooth and creamy.

Add the food colouring and mix until well combined.

Spoon the icing into a piping bag with a star nozzle and pipe the icing using a spiralling motion onto the cup cakes in a large swirl.

I went all green and put some of the green food coloring in the mixture as well. But this is totally optional, or only for the Paddy’s Day crazies out there!

Guinness Cupcakes (Ginger Cupcakes)

This recipe is quoted from this website. It’s one of those recipes that works! And very well explained by englishmum.com. She even has photos of the process on her blog. I recommend you have a look.

http://englishmum.com/sticky-ginger-guinness-cupcakes-for-paddys-day.html

Recipe:

170g Irish butter, softened
200g dark brown soft sugar
3 eggs
2 tbsp black treacle
170g self-raising flour
2 tsp ground ginger

First, beat the butter and sugar.  Soft brown sugar is the way to go here – you want the toffee, fudgy taste that it adds.

Make sure it’s really pale and fluffy before you move on to the next step.

Add in the eggs, one at a time, beating well between each addition, then add the black treacle. Mix well.

Now, sieve the flour and ginger, and add in to the mix.

Stir gently, without overworking the mixture. Spoon into muffin cases and bake at 180 degrees/gas 4 for about 15 – 20 minutes until just springy in the middle.  Remove to a rack to cool.

Meanwhile, if you want to make cream cheese icing, (this was the one I made) just whisk about 100g of cream cheese like Philadelphia with a squeeze of lemon and 200g sieved icing sugar.

Or you can just spoon over some whipped cream.  Or ganache. Or just normal glacé icing. Or just leave them plain.

NOTE: As a little trial, you can reserve a bit of the mixture and add in a couple of tbsp of Guinness. The result is pleasingly earthy and not at all unpleasant. Is adds more of an adult taste, but well worth a try.


Both cupcake recipes were tasted by my dear Irish friends, and they loved them!

That’s another great reason to celebrate!

Happy St. Patrick’s Day!

Baking · Creativity

Coconut Cake

Delicious Coconut Cake

Today I decided to make a cake.

A cake so delicious that it is only possible to happen in a day like today.

A cake for a day that only comes every two years! Yes, that’s the reason and the motivation to bake this one.

29th of February, the day of the Leap Year, that comes full of superstitions and legends.

Here in Ireland, where I live now, the main “thing”  about this date is that… if a woman asks a man for their hand in marriage today, the poor soul cannot deny her wish.

I have my own “thing” about this day. As I am already married and happily married, I just like to make something wonderful for my wonderful husband. A sweet tooth he is, nothing better than a special dessert to be savoured, without the fear of being a sugar trap for that ,oh so dreaded question for blokes.

For the singleton gals still out there, all I have to say is, try showing your desired one this treat before you pop the question. Just to prove the point that you can be a good choice in the food department, and also to leave him with his mouth watering. But only give him a slice if the answer is correct. We are very politically correct lassies these days, we don’t waste good food, unless it’s for a good cause.

Ok, so let’s bake:

Ingredients:

170 gr butter

300 gr caster sugar

4 eggs

1 tbsp vanilla extract

20o ml coconut milk

50 gr desiccated coconut (optional)

1/2 tsp of salt

250 gr self-raising flour

3/4 tsp baking powder

For the top:

200 ml coconut milk

100 gr desiccated coconut

40 gr light brown soft sugar

Instructions:

Preheat the oven to 170 degrees C and butter a large round tin.

Beat together the butter and sugar until light and fluffy. Add the eggs, one at a time, beating in well.

Then beat in the vanilla and the coconut milk.

Add the desiccated coconut and the salt, mix it.

At last add the sieved flour and the baking powder. Fold carefully until all is combined.

Pour the batter into the prepared tin, and bake for about 1 hour.

Leave to cool in the tin. After it has cooled down, pierce the top of the cake with a fork several times.

For the top, heat the coconut milk, the desiccated coconut and the sugar until all the sugar is dissolved. Don’t worry if it the misture is still very liquid.

Pour this liquid over the cake, that should be still in the tin.

The syrup will penetrate the cake and make it really moist, and the desiccated coconut will sit on top of the cake looking delicious.

Let it sit there for a few hours to absorb the syrup.

Cut into slices and serve to your loved one.

Expect only YES in response to it.

Yes, yes, yes!
Cooking · Creativity

The Best Homemade Burger Ever!

Friday night, time for comfy fast food!

Tonight we will go for BURGERS! Yay! Love them! But pay attention, it’s not just any burger.

Here we make our own, it’s tastier and way bigger than most of the burgers in town.
We add a few personal touches to make it special and even more yummy.

It’s probably the simplest thing to make, but this is Kev’s recipe, and believe me, he knows what he is doing.

HOMEMADE BURGERS (2 servings)
Ingredients:
1/2 kilo of mince meat
1 egg
1/2 cup of flour
fresh parsley
fresh mixed herbs (to taste)
1 tbsp of salt
1 tbsp of pepper (optional)

2 burger buns
4 soup spoons of mayonnaise
2 lettuce leaves (or more if you like your green)
half tomato, sliced
2 fried eggs
2 slices of cheese (whatever type you prefer)

Instructions :
Put the mince meat in a bowl, add the egg and mix it, add the flour and the parsley. Mix it.
Make two balls with the dough and flat them until they are 3 cm thick.
Put in the grill or frying pan until it is brown and cooked throughout.

Now, assemble the burger, in anyway you want. Kev’s way is bottom bun, mayonnaise, a slice of tomato, the burger, the egg, the cheese, the lettuce, mayonnaise again and the top bun.

While Kev was busy with making the burgers, I got myself busy with doing a nice vodka caipirinha.
Just to add that special Friday night chill-out feeling to our meal.

VODKA CAIPIRINHA (for 2)
Ingredients:

200 ml of vodka (a good one please, we use Smirnoff Vodka)
5 spoons of sugar
4 cubes of ice
2 limes

Instructions:

Cut the limes, in circles, put in a cocktail shaker, or just in a glass.

Press the limes a bit, add the sugar, press a little bit more, add the ice, and then the vodka.

Mix it, shake it, and put in a nice glass. And sit back and enjoy it, before, after or while eating the burgers.

Goes well with a nice movie or simply with a fun boardgame, and some music.

After all it is Friday Night!

Kev's creation in the kitchen
Baking · Creativity

Yummy Chocolate Cake

Yuuuuuummmmmmmmmmmmmyy, finally I got it right!

And I mean it, got it so right that Kev, my husband (sugar ant and chocaholic by nature) devoured half of it in one go.

And afterwards he ate some with coconut ice cream. Just for a change.

I have been traumatized with baking cakes and all sorts of stuff that we need to use baking powder and put it in the oven for 40 minutes and wait for it to get ready, without even being able to open the door at the risk of making it go totally flat or not cooked enough for a human being to eat.

It happens especially with chocolate cakes, it never worked for me, once was because I put too much baking powder and the dough grew out over the edge of the baking tray and burnt all the oven inside, leaving no cake left IN the actual tray for us to eat.

Another time it was all going perfectly fine, the cake looked fluffy inside the oven, it seemed cooked on the boards, and when I took it out of the oven it turned out that the middle of it wasn’t baked at all. So we were left without cake again.  Baaaaaaad!

Ah, there was also this time when I put the cake in the oven and it only grew in the middle, looking like a mountain, it also wasn’t cooked inside and it was really really dry and hard.

This time I got a recipe from the internet but I also looked it up on this website too and kinda combined the two recipes and made my own version, and, believe if you want, it worked just fine.

Here is the picture to prove it.

yumm

And here is the recipe, of course, since this is a miracle, it needs to be shared with humanity.

YUMMY CHOCOLATE CAKE

Ingredients:

1 cup (200 gr) of sugar

2 soup spoons of butter

1 cup (200 gr) of chocolate powder

1 egg

1 cup (200 gr) of all purpose flour

1 cup (200 ml) of full fat milk

1 soup spoon of baking powder

Directions:

Mix the sugar and the melted butter in a bowl. The secret is to use the mixer. But if you don’t have one, or want to make it 50’s style, just press the ingredients together with a fork until they are crumbly. It’s a matter of effort, but it pays off.

Add the egg, and beat it until it is creamy and smiling to you. Then add the chocolate and make a delicious brown paste.

Before you eat it all, add the flour and the milk, bit by bit, and mixing. Another secret dear readers, when adding the flour make sure you pass it through a sieve.

Last but not least, (without this it would be just like my other cakes) add the baking powder, also passed through the sieve. But this time don’t beat the dough like crazy, otherwise it will be like my previous cakes, remember? Just mix it real slow.

Pre-heat the oven to 200 degrees Celsius, or something like that, maybe less for fan assisted ovens.

Grease the baking tray with butter before you splodge the cake on it, and sling it in the oven for about 35 minutes or until your patience allows.

Watch out for the smell, it’s SWEETASTIC!, it makes you think of your grandma and when you were a child with chocolate from ear to ear, with a big chocolatey smile, happy times!

These moments don’t just have to be in the past.

When that cake is ready, you can re-live that universal childhood memory without your mom giving out to you for dirtying your clothes (and the walls) this time around.

After you get over the delicious wave of aroma, and before you devour the cake, you can make a delicious covering with chocolate and whatever you wish to put on the top of the cake.

We hope that next time we will be strong enough to make a cake topping, instead of just eating the cake and drinking tea all afternoon.

It’s tea time!
Baking · Creativity

We LOVE Pastry Stuff!

In the last two months while I was unable to get out of the house, due to my broken foot and all that comes with it, my lovely hubby Kev had to learn how to go grocery shopping for us.

Not that he didn’t know how to do it, but simply because he had to learn MY way of doing the grocery shopping.

Basically, I would write all the items on a grocery list and he would get them, exactly as I had written.

Most of the items were correct, and the ones he wouldn’t find, he would replace with the closest possible. Sometimes that tactic worked, sometimes it didn’t.

For example, one day I asked him to buy ham, and he came home with a packet of mortadella. As you can see, the closest possible thing that we could find. (Mortadella can be called bologna, boloney, baloney, or polony, but I will use mortadella because I think it’s charming).

As I looked at the package I saw a recipe of a round pastry cake, similar to Danish Pastry, but savoury. It’s basically a roll of baked dough, filled with mortadella and cheese.

I decided to try the recipe, because the mortadella would be in the fridge for a while, until it went off and I would have to throw it out.

The thing is that I had already tried some “back-of-the-packet recipes”*, and they didn’t quite work. So, reluctantly there I went, checked if I had all the ingredients, mixed them all, and guess what, it worked!

It was really nice that I did the recipe again, with chicken filling, and this time I took a photo to prove it.

The good thing about this recipe is that you can put any filling that you want. My recipe can be found below with both fillings, the mortadella (easier and quicker to prepare), and the chicken (with more ingredients, and not so dry), for variety. 🙂

Hope you get it right, enjoy baking and eating it.

*Back-of-the-Packet Recipes – in Brazil nearly all the things that you buy in the supermarket come with a recipe written on the packaging. For example, if you buy flour, there is a cake recipe on the paper package. If you buy a can of green peas, they give you a vegetarian recipe. Even the sugar packaging has serving suggestions. I think it’s a nice way of giving you ideas to cook, or simply a way of not leaving many blank spaces in the packaging. I never noticed this in the other countries that I had been in, but here it seems to be pretty common, and sometimes if you get it right, delicious too.

Mortadella Pastry Roll

Ingredients

Dough

150 gr of active dry yeast

1 cup (200 ml) of full fat milk

3 cups (200 gr) of all-purpose flour

Half teaspoon of salt

100 gr of butter

1 egg

Mortadella filling

300 gr of mortadella

1 soup spoon of parsley

150 gr of Ricotta cheese

Chicken filling

1 small onion shredded and flash-fried

300 gr of cooked ground chicken

1 soup spoon of parsley

250 gr of cream cheese

1 soup spoon of soy sauce

2 soup spoons of tomato sauce

Directions

Dissolve the yeast in warm milk, let it soften for a minute.

In another bowl, put the flour and the salt. Then pour the yeast mixture, slowly, then add the egg and the butter lastly. Very gently turn the mixture over, until all the ingredients are consistent.

Knead the dough, until it’s uniform. Cover it with a plastic wrap and refrigerate it for about 40 minutes.

In a separate bowl, mix all the ingredients for the filling.

Lightly flour a work surface (a cool surface, such as marble, is ideal), turn the dough out onto it, and dust the dough lightly with flour. Using the palms of your hands, pat the dough into a rough square.

Place the filling on the dough, keeping it all on one side, roll out starting with the part that has the filling, it should shape like a swiss roll.

Put the roll on a baking tray previously greased with butter and dusted flour.

Sling it the into a pre-heated oven, at medium heat for about 30 minutes.

The secret: Baist the top of the pastry roll with the yolk of an egg, to give that crispy texture and brownie colour to it.

You can serve with some salad in the Summer, or some soup in Winter. Your choice!

Back-of-the-Packet Recipes actually work!